

How To Make A Miniature Woodland Garden
This tutorial on how to make miniature trees easy will demonstrate the process I settled on to get reasonably convincing miniature trees without breaking the bank.
Disclosure: Some of the links below are affiliate links, meaning, at no additional cost to you, I will earn a commission if you click through and make a purchase. The commission earned helps maintain this site.
How to Make Miniature Trees Easy – Item List
First up, here's a list of items you'll need:
- Twist ties
- PVA glue (like Elmer's or Mod Podge)
- Superglue
- Epoxy putty
- Clump foliage
- All purpose joint compound
- And some basing materials
Some of this stuff is basic supplies you should already have.
Making the Wire Armature
The wire armature is the primary component of the miniature tree. I am using plastic coated garden twist tie to make my armatures because it's a cheap way to get lots of material.
You can use any twist ties, or even pipe cleaners, you have available. Un-coated wire could be used but you'll need much more of it to build up bulk.

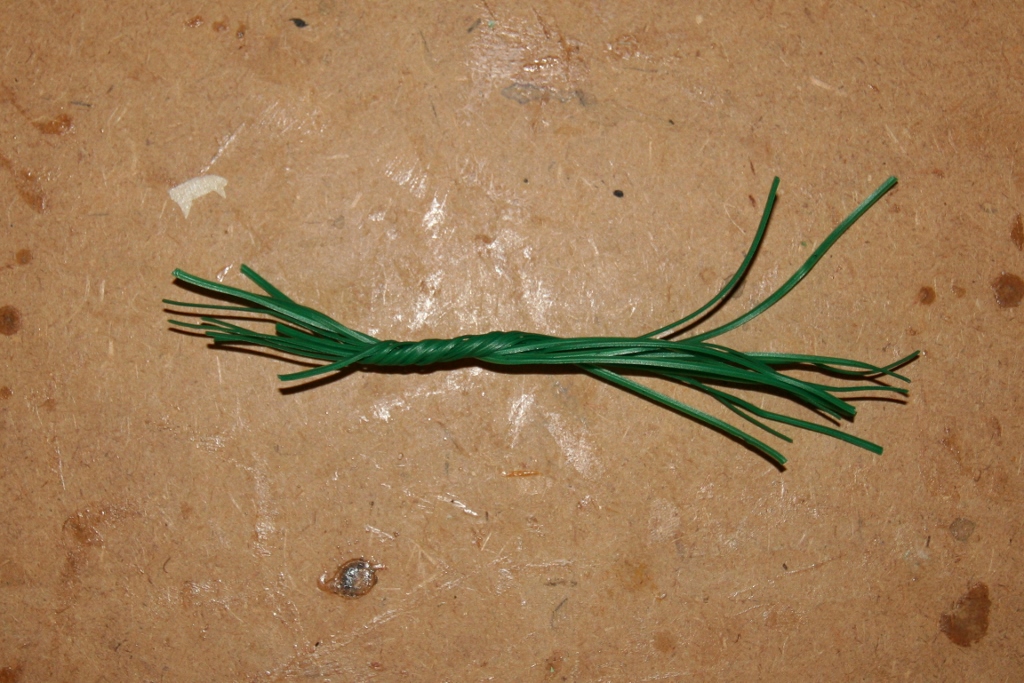
Start with a bundle of twist ties. The number you use will determine the girth of the tree and number of branches. The length will determine the height.
For this miniature tree I am using 12 strands cut 6-8 inches in length. Don't worry about lining them up as you bundle the twist ties. Just group them up and twist the whole bundle to start forming the trunk. Leave about an inch untwisted at one end and work toward the other end.
After you form the trunk you can start forming the branches. Separate a few strands from the bundle, making sure to take one or two from the opposite side, and pull them through the bundle. This will help lock the branch in place. More strands means a thicker branch.
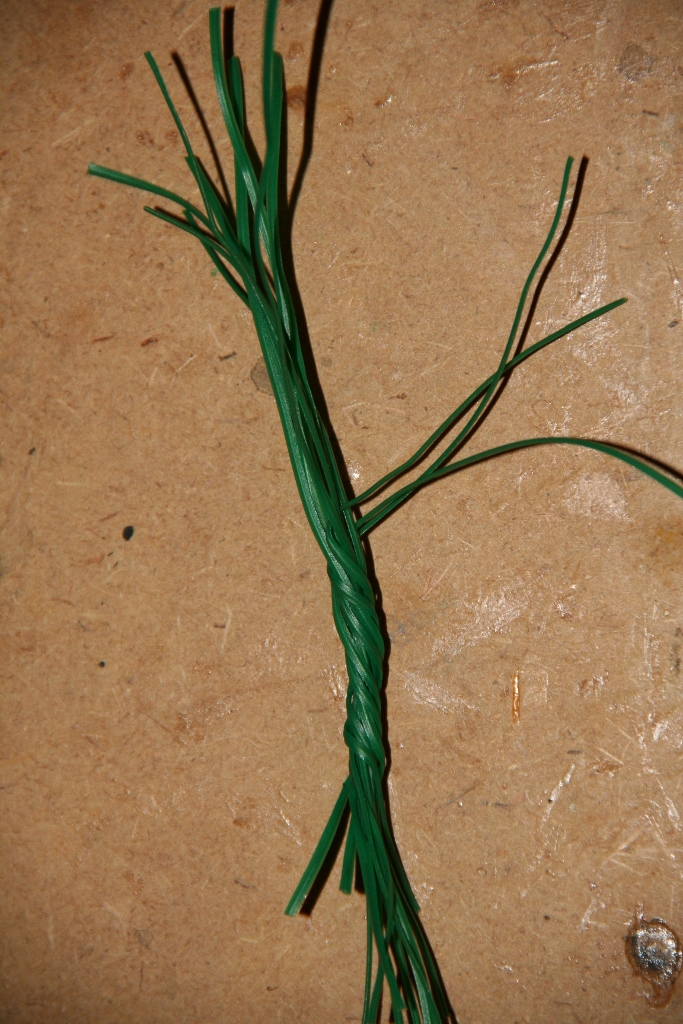
Twist the branch, starting from the trunk, and moving toward the end.
As you work away from the trunk you can further split the bundle to form smaller branches off the first. Leave about a half inch to one inch of each strand untwisted so you have something to glue the foliage to later.
If you're making dead or winter trees you can twist them all the way to the end so they aren't so flat.

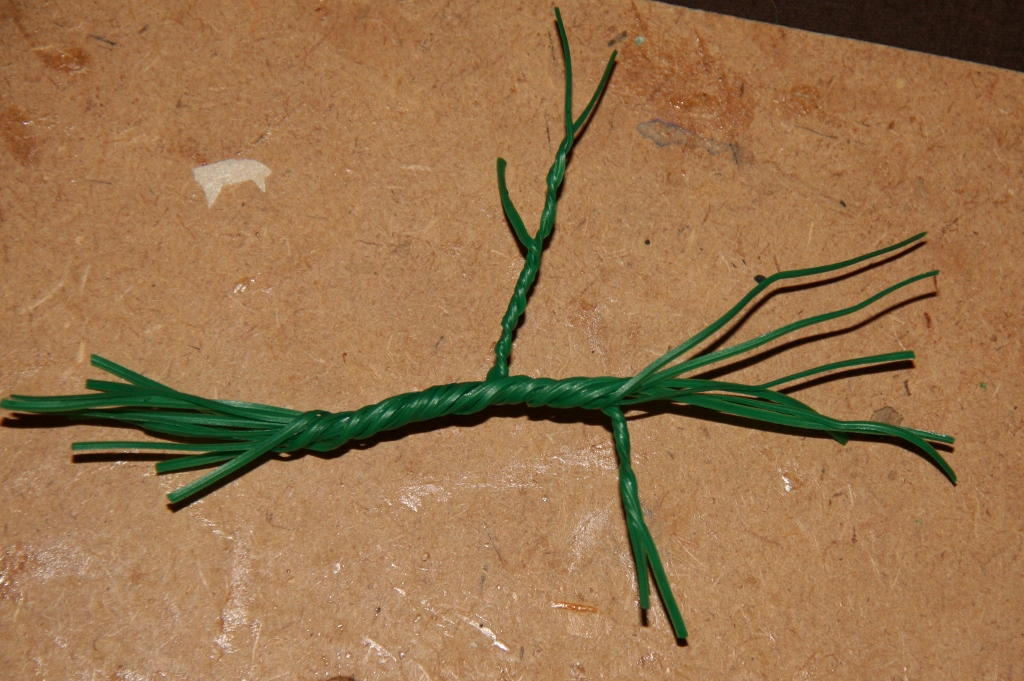
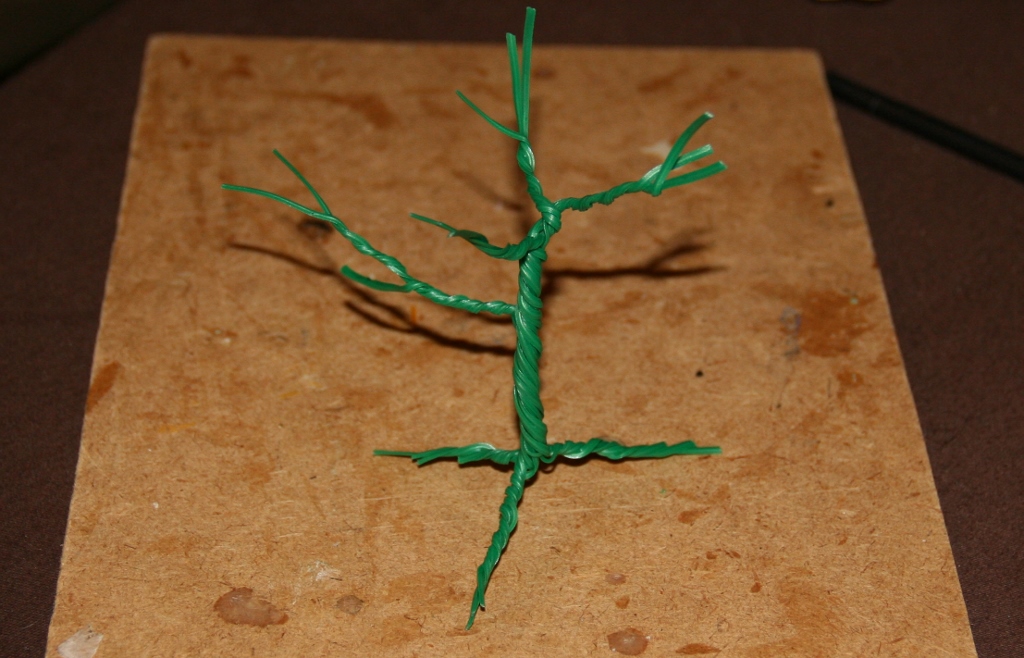
After forming the first branch, continue twisting up the trunk and splitting branches off as you go. Continue this process until you've twisted all of the strands into branches.
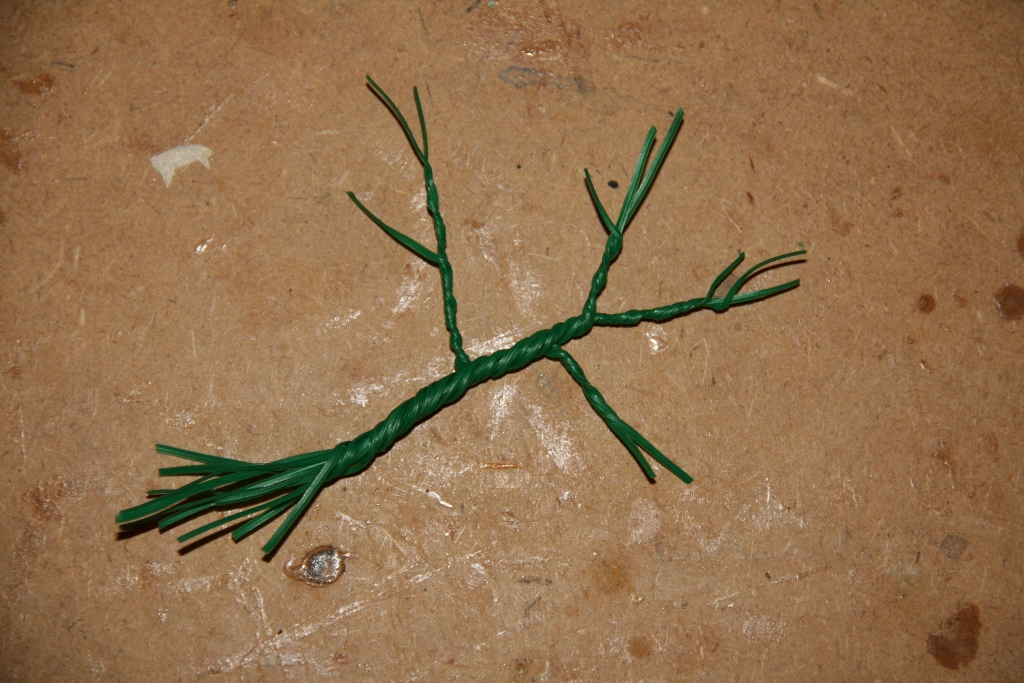
Now that you have the basic miniature tree formed, you can address the loose strands where you started.
Split these into two or more groups and twist each into a root. These will create the impression of exposed roots, and they also give you something to glue down to the base.
If you don't want an exposed root system you can spread the bottom strands out without twisting them, so they are easy to cover up after gluing down.
With the roots formed you should be able to stand the tree up.
Bend the trunk and branches around until you have the miniature tree shape you are looking for.
I decided that the lowest branch looked a little too thin. If you want to bulk out your tree at this point it is easy to add more twist ties. I start by lining the new strand up with an existing branch.
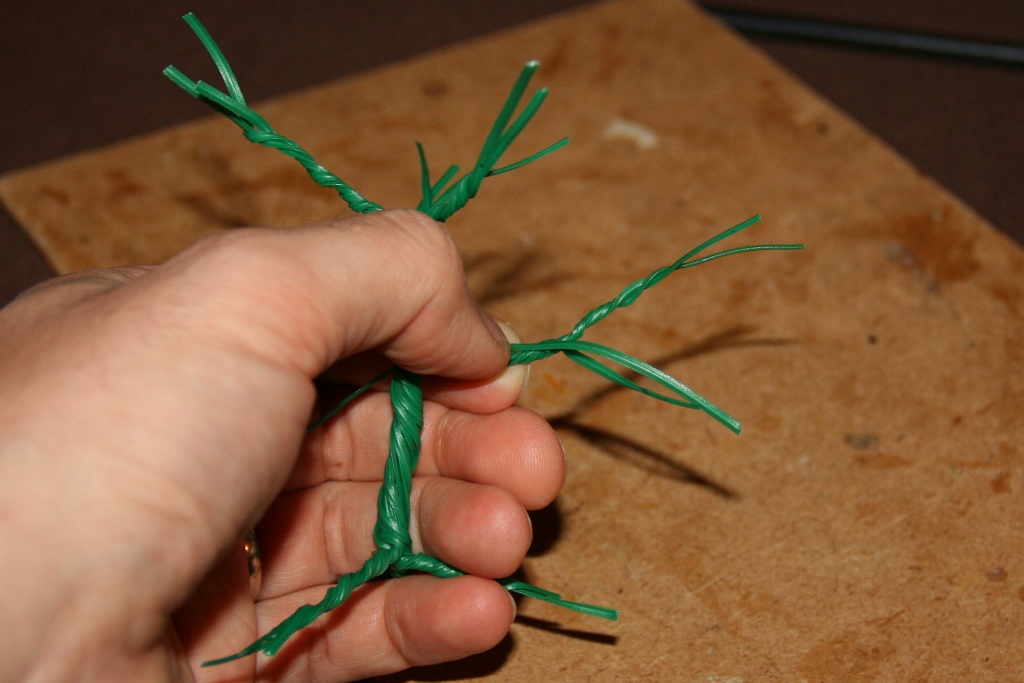
Then I twist the new strand onto an existing branch to make it thicker.
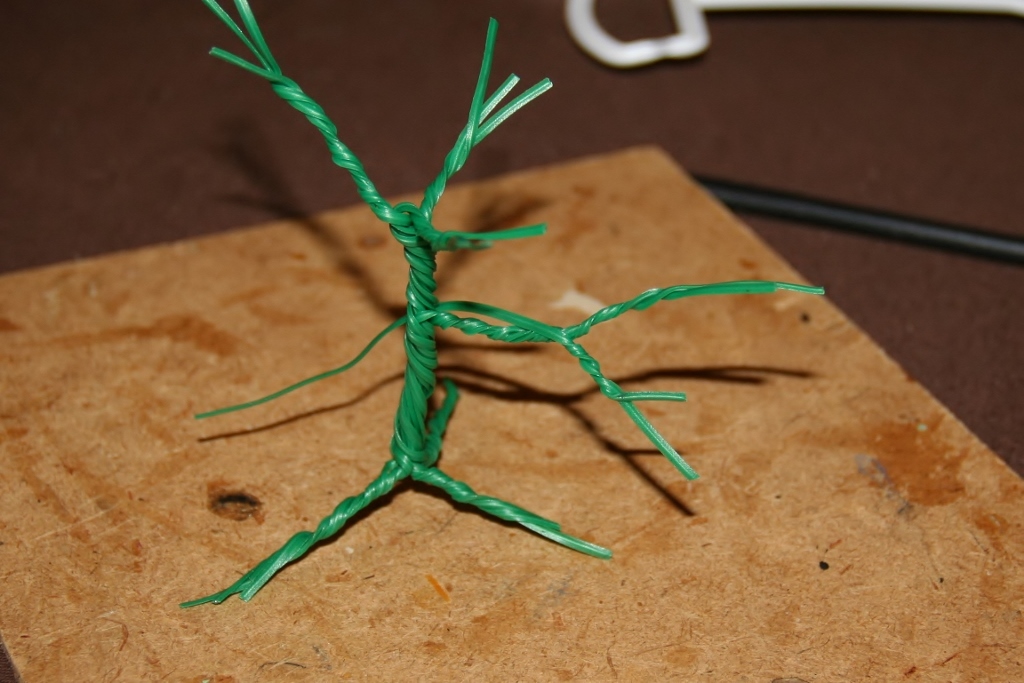
I continue to work my way down the branch and trunk until I've twisted the rest of the strand around the tree.
You can add as many new strands as you want to thicken branches or even add new ones. Make sure the strands you add are long enough to make it all the way down the trunk. This will ensure that the trunk appears thick enough to support any branches you thicken/add.
Base Mounting the Trees
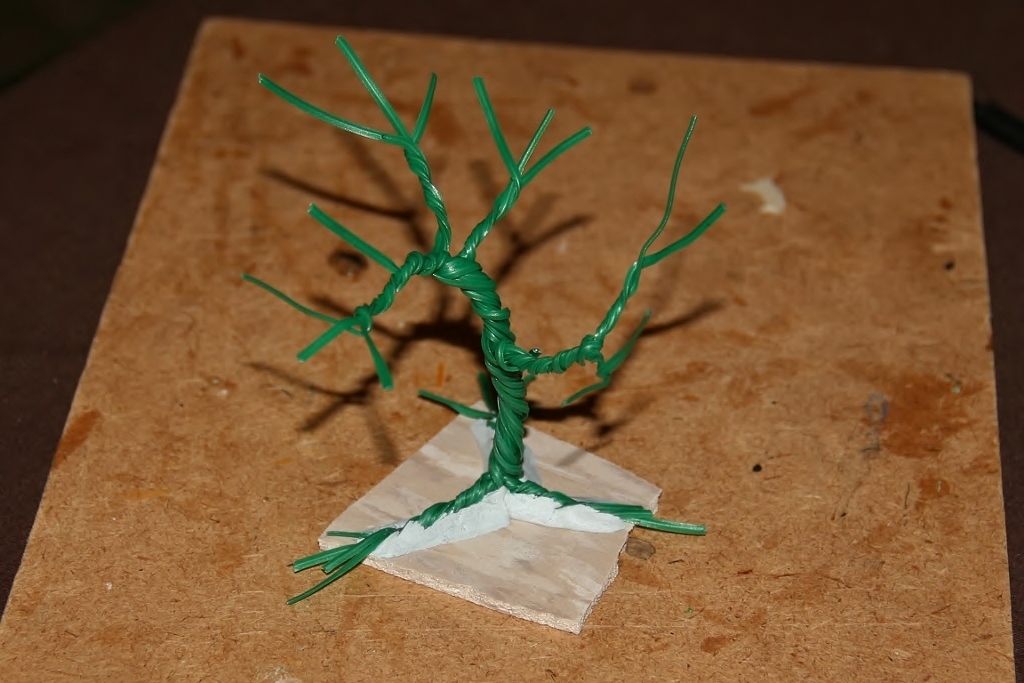
Now that I have a tree shape I am happy with, I am ready to mount it on a base.
Whatever you use as your base, make sure it is large enough to be stable. The only reason trees stay standing in real life is that they have extensive root systems hidden below the surface. Without that in your favor, you need a wide and/or heavy base to keep your miniature tree stable.
For the test trees in my earlier post I used some flying bases I had sitting around. For this one I decided to use a chunk of vinyl composite flooring because it's heavy and the more random shape is fitting to scenery bases. It's also pretty cheap at 70 cents per square foot.
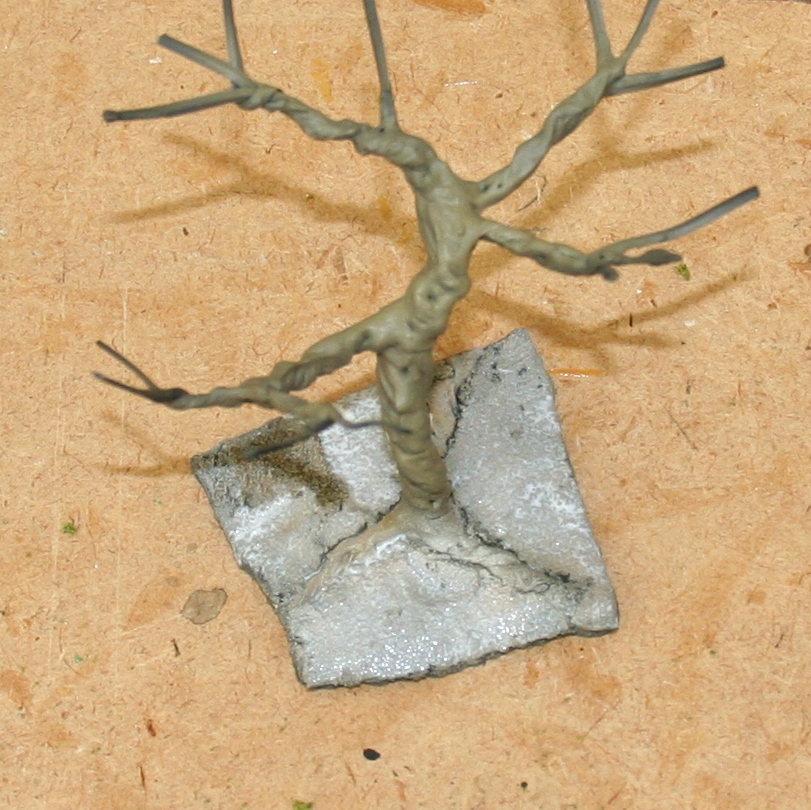
There isn't much flat surface on the roots so I used an epoxy putty to attach the miniature tree to the base. This is a two-part putty similar to Kneadatite (green stuff), but it is stickier and only has a 5-minute work life. It's crap for sculpting but it's great for holding things together.
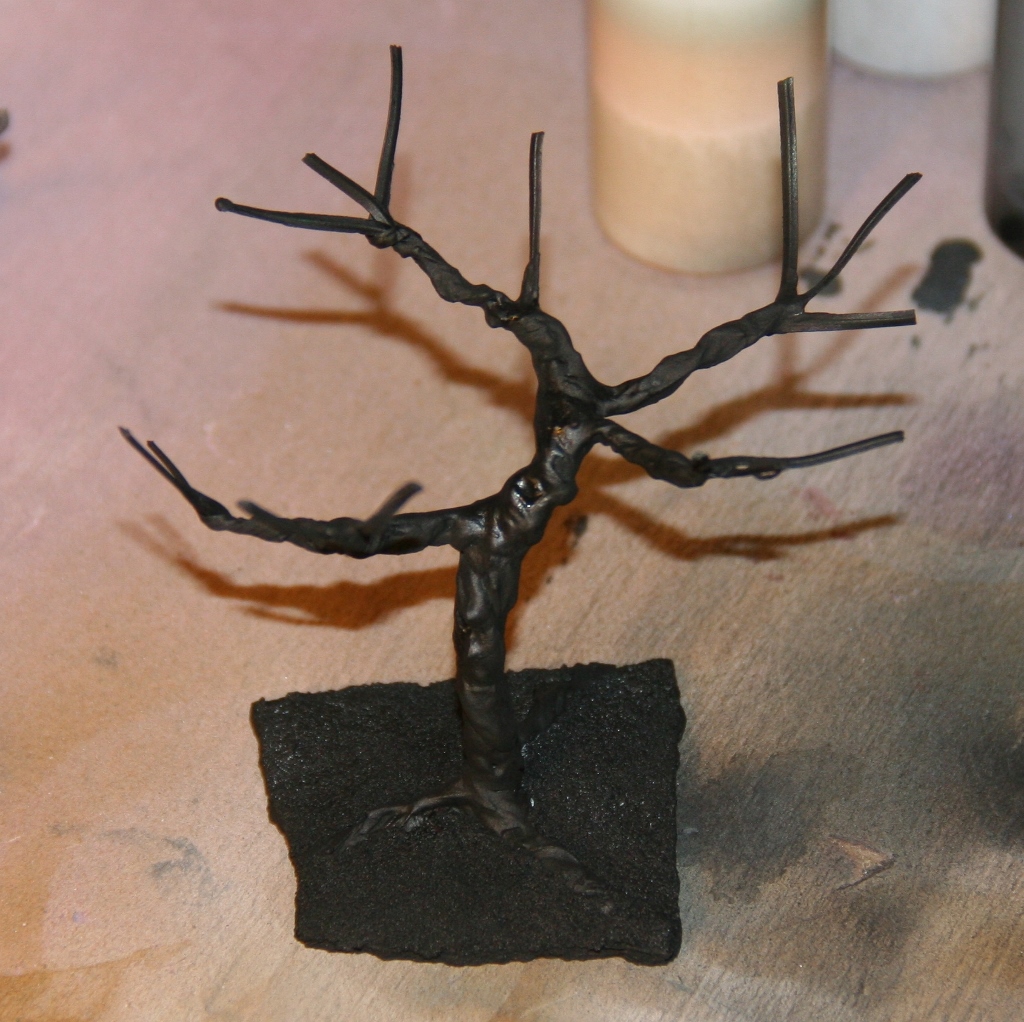
Coat the Trees
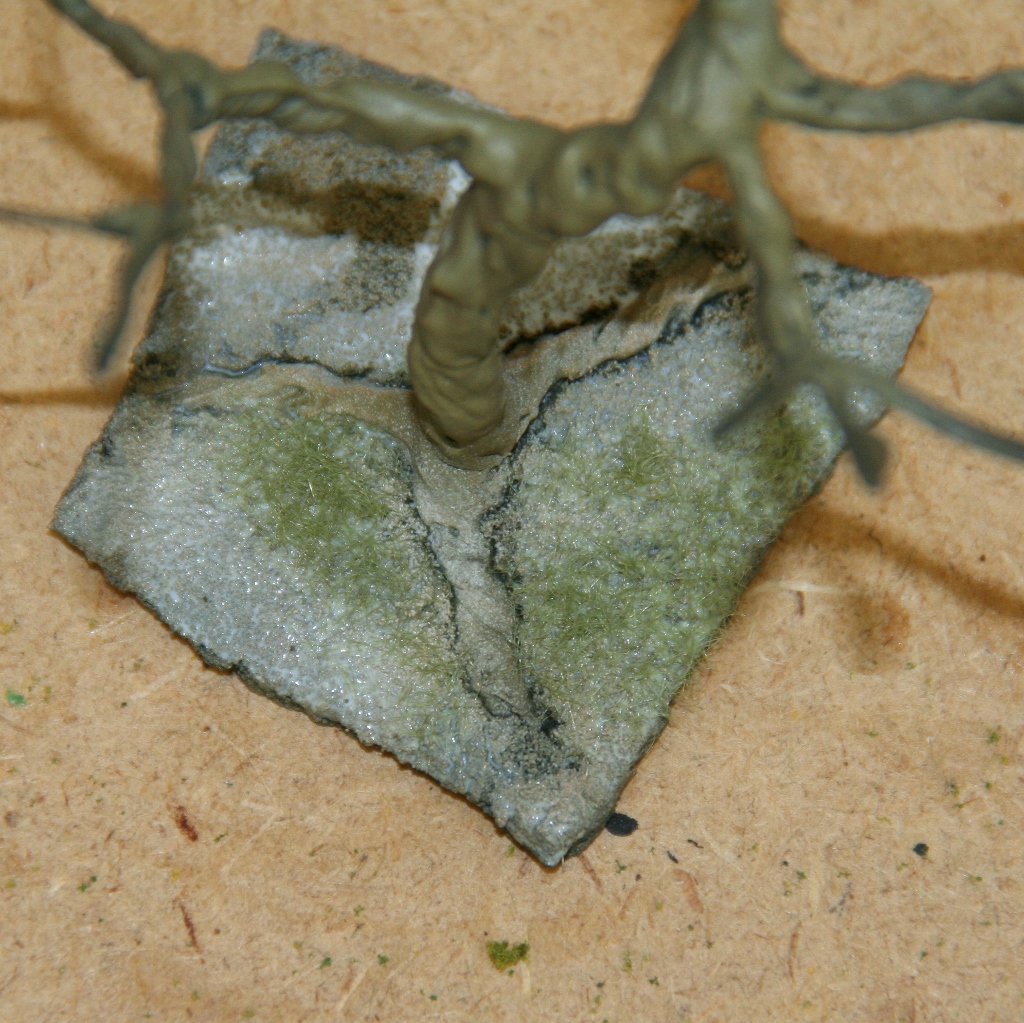
After the putty is fully cured, I trimmed the root tips flush with the base. Then I used pre-mixed grout to add "dirt" to the base, leaving the tops of the roots exposed.
Then I coated the tree with all-purpose joint compound. This hides the twist ties and creates a nice, knobby bark texture. It also makes the tree more rigid.

Step #4) Painting the Miniature Trees
Now, it's time to paint our miniature tree!
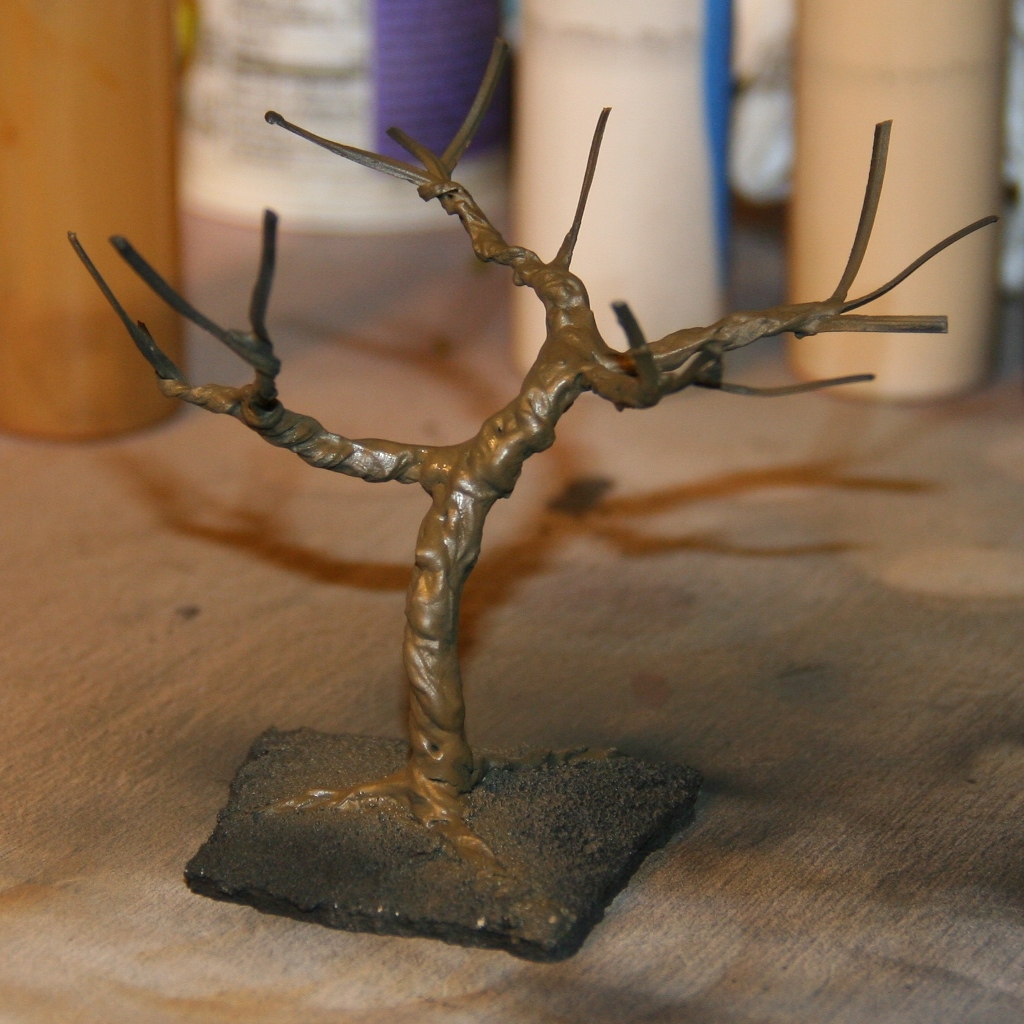
I used an airbrush for this but you can go with bristles or spray cans if you prefer. First a couple of coats of black primer.
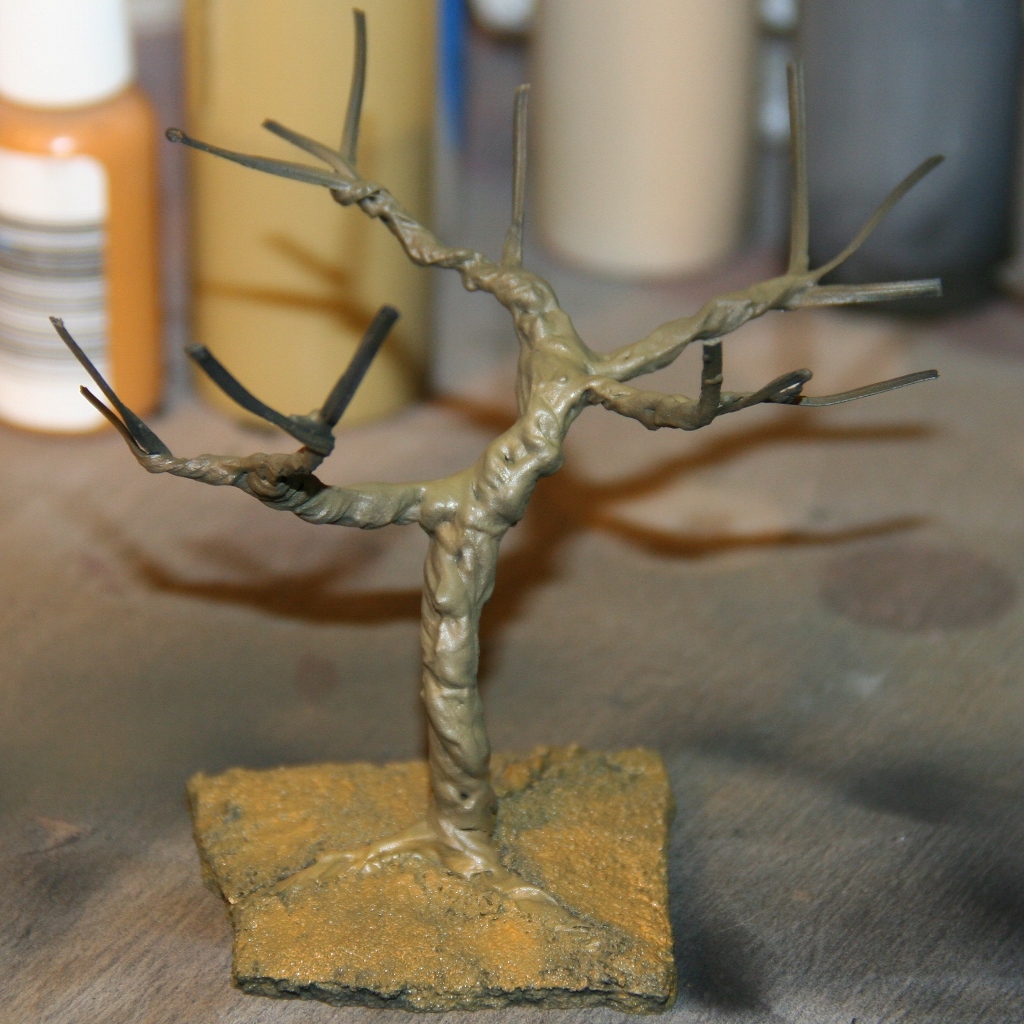
Then brown…
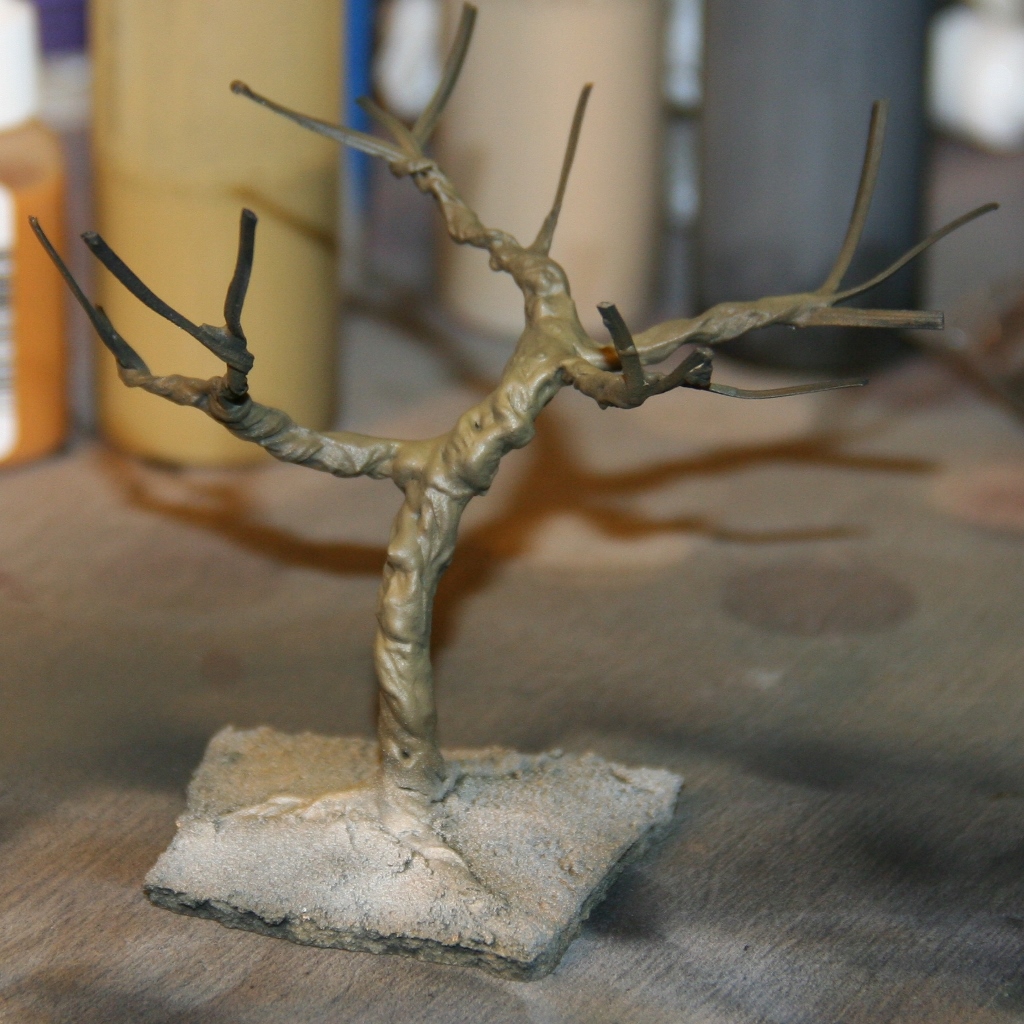
and a tan highlight…

Then some golden brown for the base.
And finally a light tan highlight for the base.
Step #5) Details & Foliage for the Miniature Trees
I don't worry about getting as detailed, or clean a paint job as I would with most of my other models. Trees don't require much to look good.
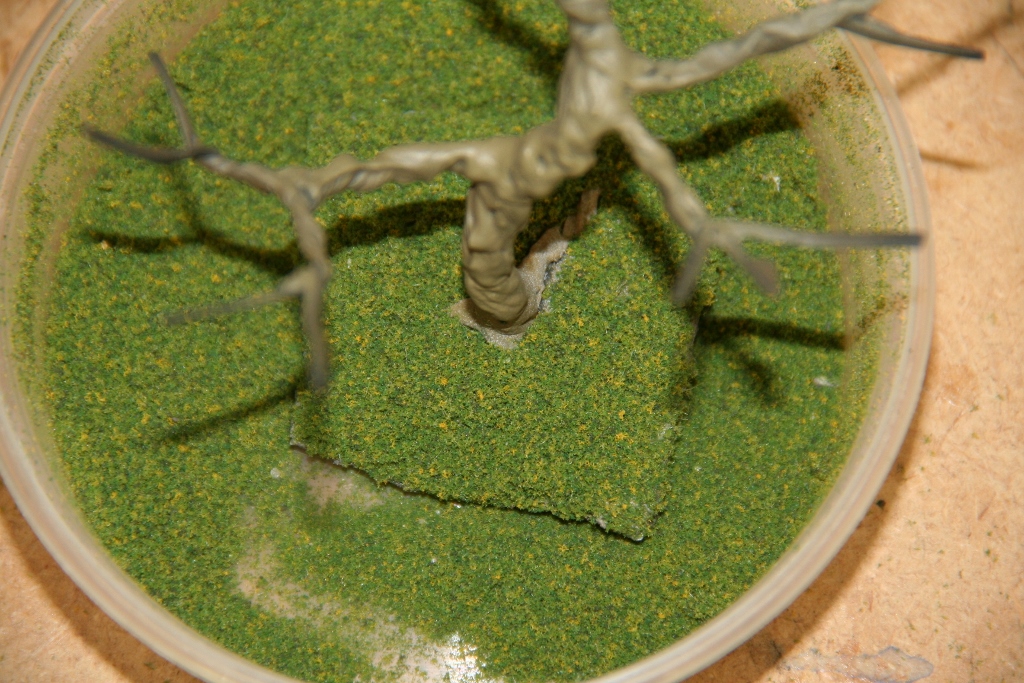
Next I decorate the base using similar methods as I used on my stepped hills. I coat most of the base with watered down PVA glue (Mod Podge in this case.)
I add clumps of static grass.
And with the glue still wet, I submerge the base in a small container of green flock. I hold the base over the container and tap it to knock off any excess.
Next I add foliage. I am using clump foliage for this. It's a lot like flock but in big chunks.
I separate some nice big pieces from the smaller bits.
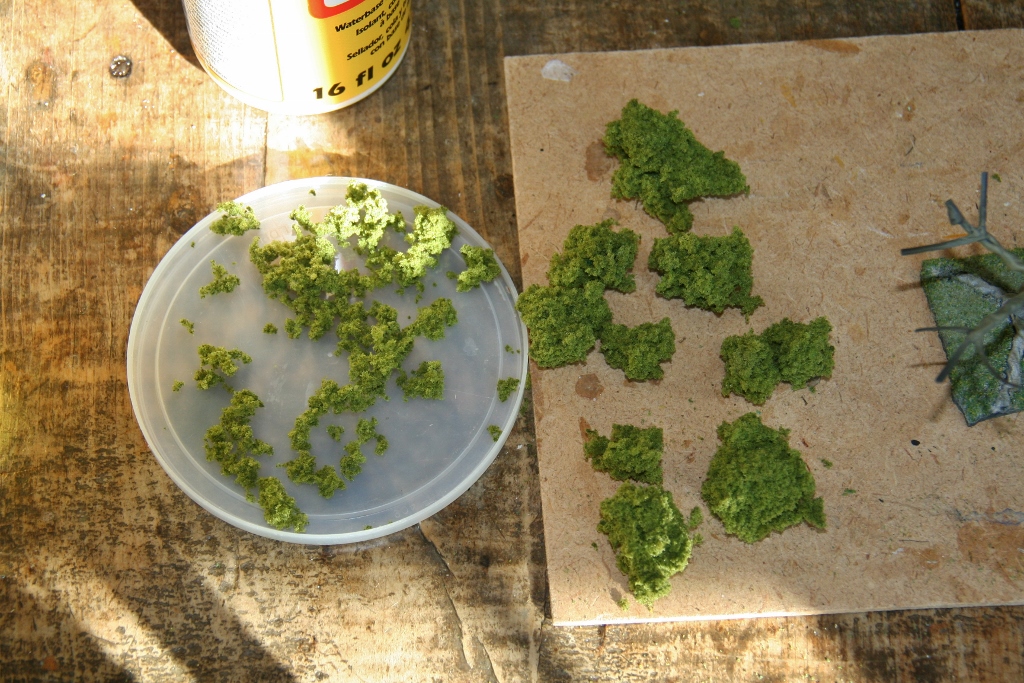
Then I use superglue to attach them to the ends of the branches.
First I glue a piece to the top side, then I add a second piece to the bottom. I haven't had great luck using PVA for this, but it does work well to attach clumps of the foliage together.
I put a little superglue on the twist tie, then add some PVA to the clump foliage itself.
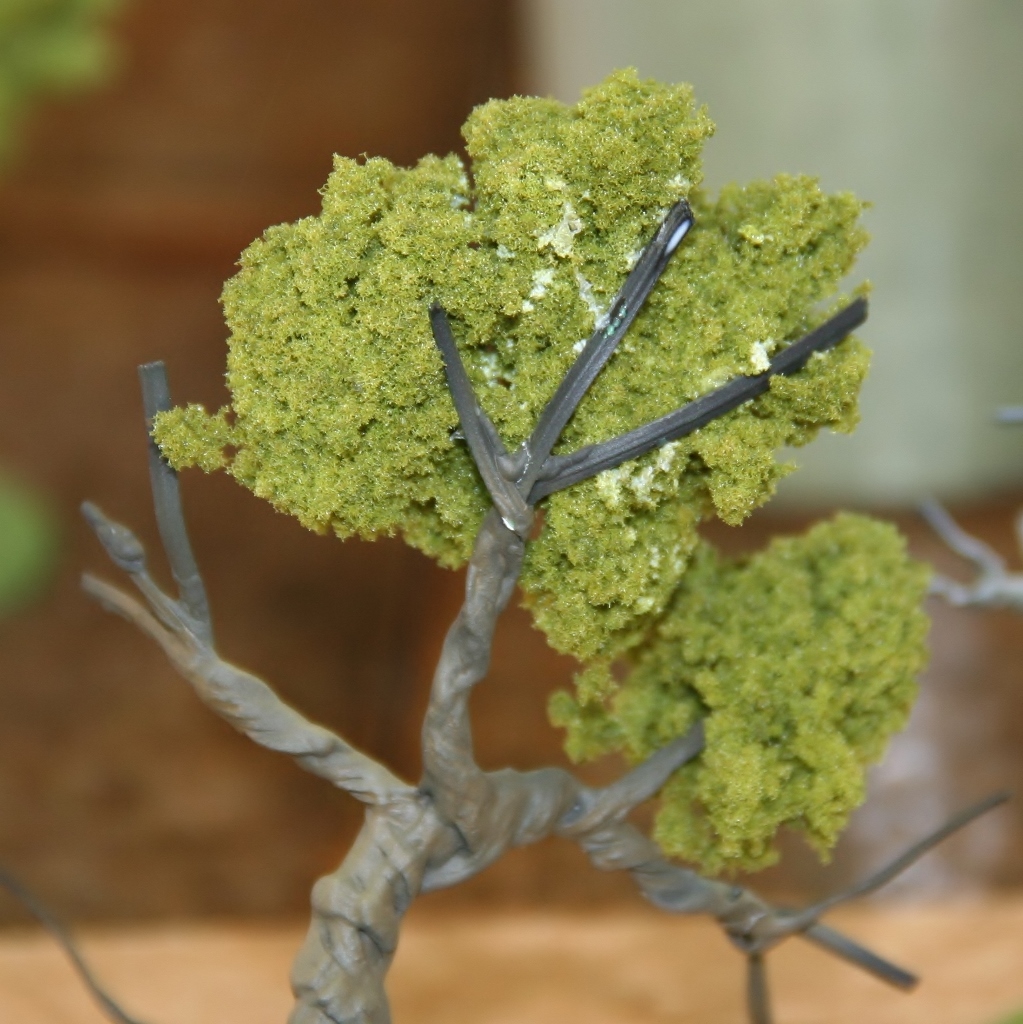
Keep adding foliage to the branches until they're all full voila, tree!
In some places I've used PVA to add more foliage directly to the larger clumps to bulk them out a bit.

After all of the glue dries, I give this a coat or two of matte sealer to protect the paint and help hold all of the foliage together.
Completed Miniature Trees
Here's a shot of the finished miniature tree in the sunlight.


In this last photo you can see the new miniature tree next to the two test models. The middle tree shows how this process looks with leafless trees. The tree on the left was done without coating the twist ties before painting. As you can see the tree still looks good without it, just different. I plan to use a mixture of these three looks to add some extra variety to my forests.
If you're after more simple wargaming terrain then check out my tutorials on making tank traps and DIY barbed wire. I also have a complete tutorial on a cheap wargaming table with terrain as well.
So, there's my method for how to make miniature trees easy. It's dirt cheap and looks decent.
Materials List
Here's the materials list again to save you from scrolling up.
- Twist ties
- PVA glue (like Elmer's or Mod Podge)
- Superglue
- Epoxy putty
- Clump foliage
- All purpose joint compound
- And some basing materials
How do you like them? Do you have any ideas to improve the process?
Wargaming Terrain & Scenery Tutorials
Tutorials to help you create a great wargaming table.
- Author
- Recent Posts
Please Rate this Article
Please take a second to rate this. It helps us deliver to you the stuff you enjoy.
Get Exclusive Content
How To Make A Miniature Woodland Garden
Source: https://creativetwilight.com/miniature-trees/
Posted by: hagemanhimpre.blogspot.com
0 Response to "How To Make A Miniature Woodland Garden"
Post a Comment