

How to manually configure a VPN on Windows 11
On Windows 11, the best VPN (virtual private network) services volition provide an app to connect speedily to their individual networks. Yet, you may however desire to configure the VPN manually if the app isn't working every bit expected or you lot don't want to install an extra piece of software.
Whatever the reason information technology might be, Windows eleven provides an pick to configure and manage VPN connections from the Settings app, which you lot can use to connect to nearly whatsoever VPN service to improve your online privacy and access other locations' restricted services.
In this Windows 11 guide, we will walk y'all through the steps to set up up, connect, disconnect, and delete a VPN connection.
- How to set a VPN connection on Windows 11
- How to connect a VPN connection on Windows xi
- How to disconnect a VPN connection on Windows 11
- How to remove a VPN connexion on Windows 11
How to prepare a VPN connection on Windows 11
To gear up a Windows 11 VPN connection, use these steps:
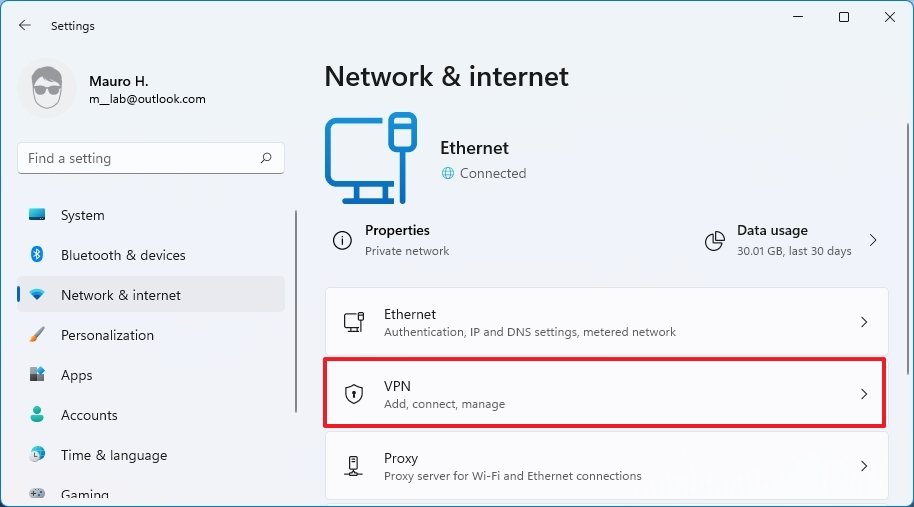
- Open Settings.
- Click on Network & net.
-
Click the VPN page from the right side.
 Source: Windows Central
 -
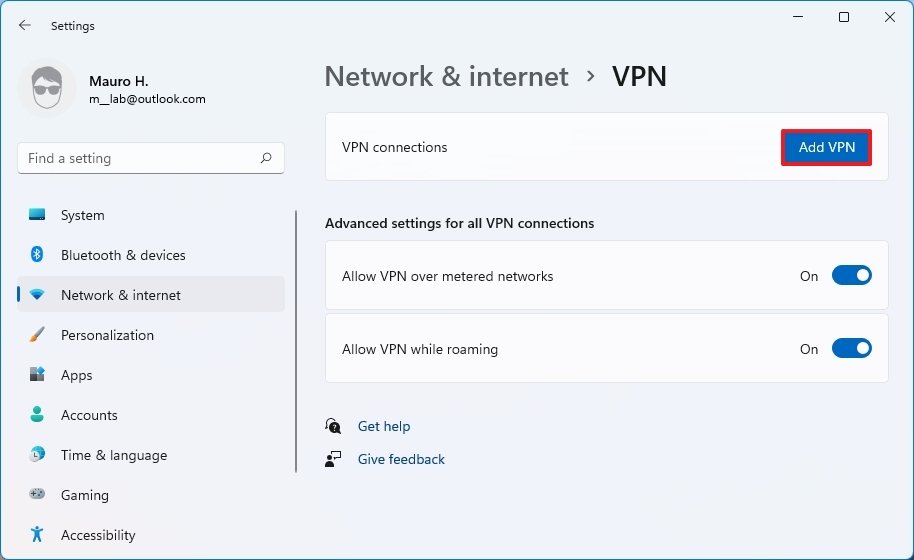
In the "VPN connections" setting, click the Add VPN button.
 Source: Windows Key
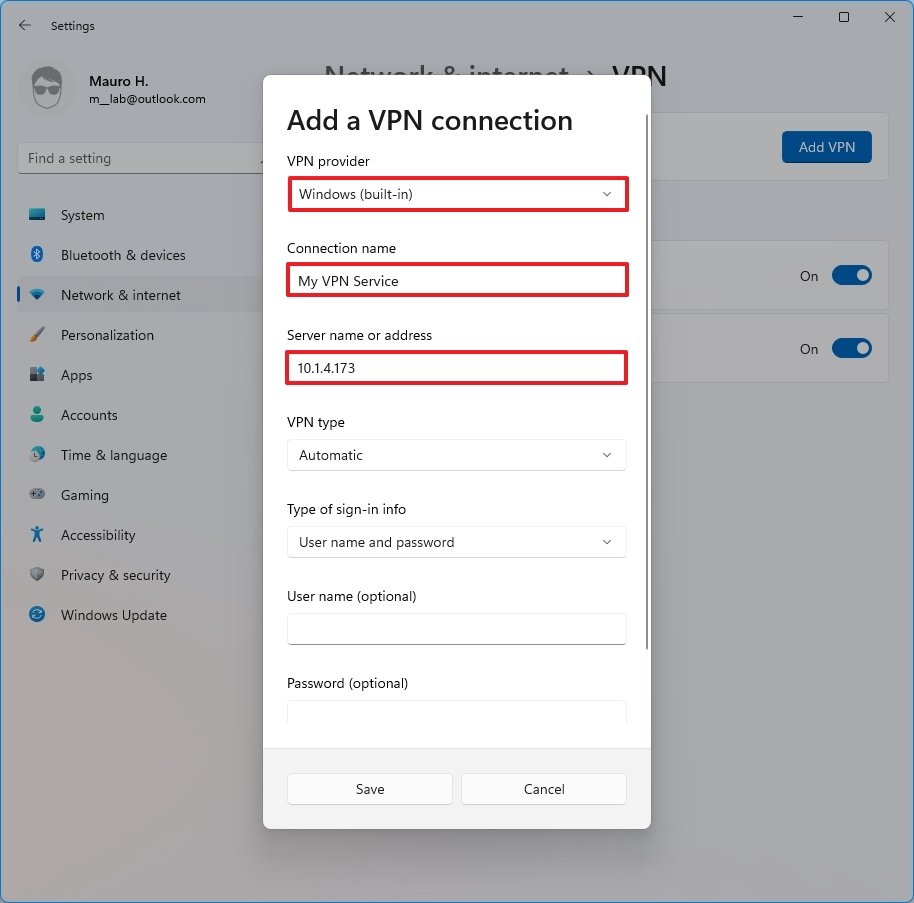
 - Apply the "VPN provider" drop-downward card and select the Windows (built-in) option.
- In the "Connection name" setting, enter a name to place the connexion — for case, you can use the service name like IPVanish, Private Internet Access, etc.
-
In the "Server name or address" setting, enter the address of the VPN server — for example, vpnserver.com or 122.122.122.122.
 Source: Windows Fundamental
 - Employ the "VPN type" drop-down carte and select the Automatic selection or the protocol required to connect to the particular VPN server.
-
Utilize the "Type of sign-in info" drib-down menu and select the authentication method.
Quick note: This option volition depend on the VPN provider settings.
- Confirm the username and password if you select the "User proper noun and password" option.
- Click the Save push.


Once you complete the steps, you can connect to the VPN service from the Settings app or Taskbar.
How to connect a VPN connexion on Windows 11
To connect to a VPN server, use these steps:
- Open Settings.
- Click on Network & internet.
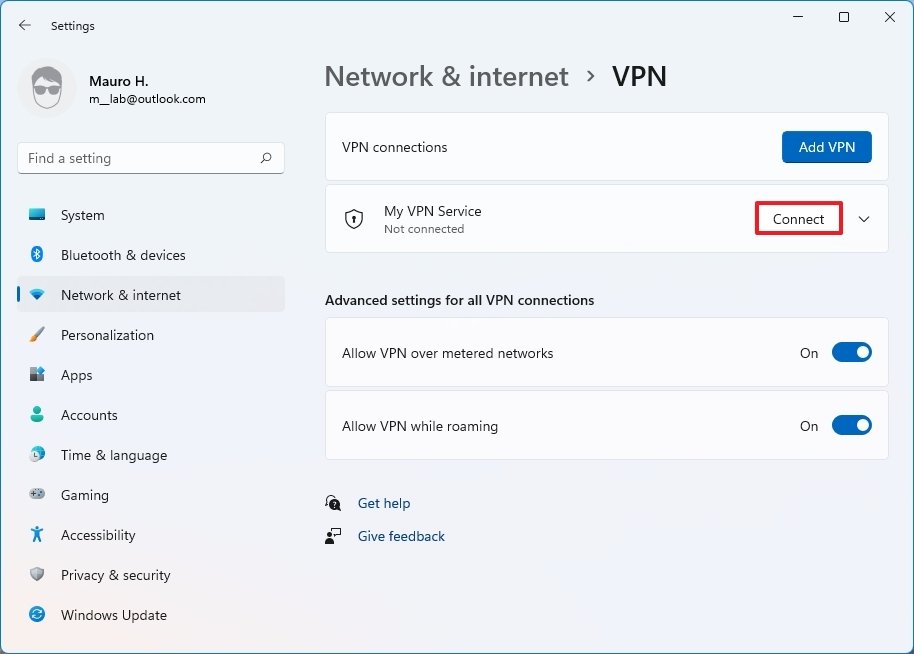
- Click the VPN page from the correct side.
-
Click the Connect push for the connection
 Source: Windows Cardinal

After y'all complete the steps, the computer will connect to the VPN server.
Connect from Taskbar
To make a VPN connectedness from the Taskbar, use these steps:
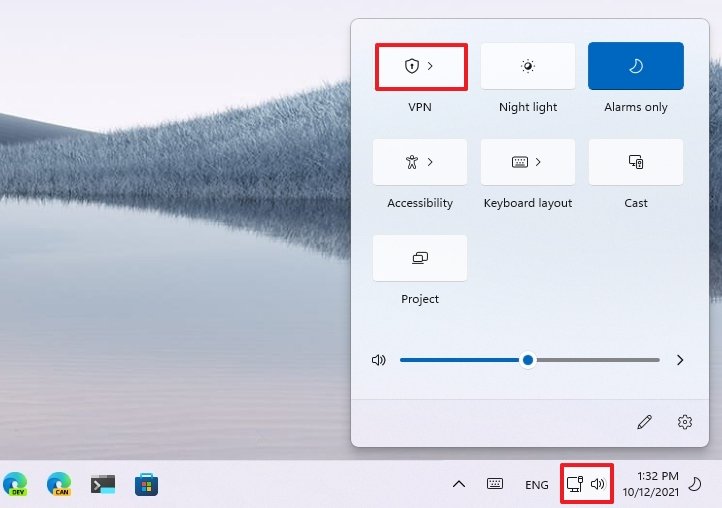
- Click the network icon in the Taskbar
-
Click the VPN push.
 Source: Windows Central
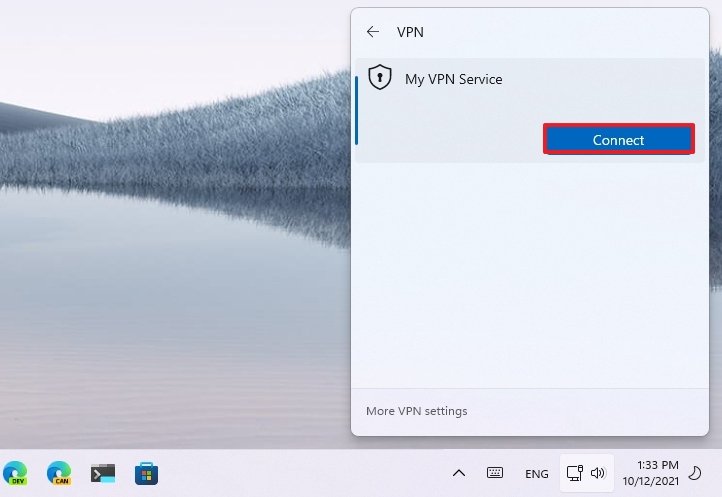
 - Select the VPN connexion.
-
Click the Connect push button.
 Source: Windows Central


In one case you complete the steps, similar using the Settings app, the device volition authenticate and connect to the remote network.
How to disconnect a VPN connection on Windows 11
To disconnect a VPN connectedness, employ these steps:
- Open up Settings.
- Click on Network & internet.
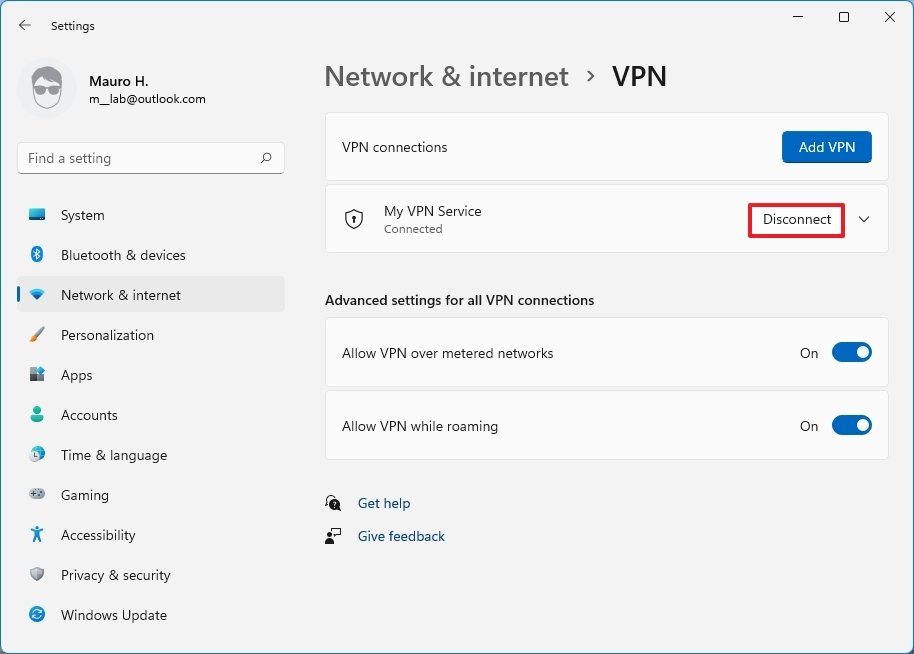
- Click the VPN page from the right side.
-
Click the Disconnect push.
 Source: Windows Central
 - Click the Ostend button.

After yous consummate the steps, the computer will disconnect from the VPN server.
Disconnect from Taskbar
To disconnect a VPN connection from Taskbar, use these steps:
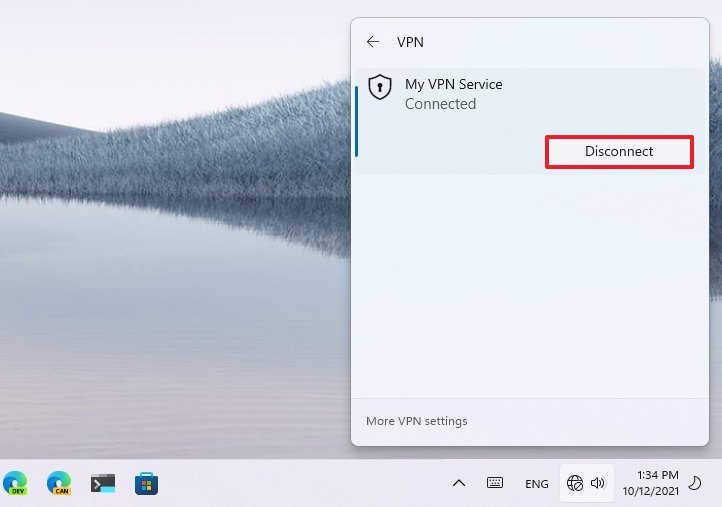
- Click the network icon in the Taskbar
- Click the VPN button.
- Select the VPN connectedness.
-
Click the Disconnect button.
 Source: Windows Central

Once you consummate the steps, the laptop or desktop will cease its connection to the remote virtual private network.
How to remove a VPN connexion on Windows 11
To remove and delete a VPN connexion, use these steps:
- Open up Settings.
- Click on Network & internet.
-
Click the VPN page from the right side.
Source: Windows Central - Click the connection to admission its settings.
- Click the Disconnect button (if applicable).
-
Click the Remove button.
 Source: Windows Fundamental

After you complete the steps, the VPN connectedness will be removed from the computer.
Our elevation VPN and software picks
If you lot desire to complete the configuration steps, you lot will demand a reliable VPN service and Windows xi or 10. We lean toward ExpressVPN thanks to a great price, tons of features, and proven security, simply in that location are more options listed below.
![]()
Premier VPN service : ExpressVPN
With robust encryption and plenty of connection protocols, including OpenVPN, this is ane of the all-time services operating today.
From $6.67 monthly at ExpressVPN

Microsoft'southward OS : Windows x Home
Windows 10 is no longer the latest OS from Microsoft, but information technology's still extremely common as Windows eleven rolls out. Upgrade for free to the new Bone, or continue on using Windows x every bit you'd similar.
More than great VPN services
Is ExpressVPN not for you? Bank check out these other excellent VPN services we recommend. You can also have a look at our roundup of the current best VPN deals if you are looking to relieve some money.
![]()
Surfshark VPN (Come across the latest pricing at Surfshark)
Surfshark puts no limit on how many devices can connect, making it a great VPN option for the whole family.
![]()
CyberGhost VPN (Meet the latest pricing at CyberGhost)
Tons of servers, robust security, and affordable long-term plans make CyberGhost an excellent pick for many people.

Private Internet Admission (See the latest pricing at PIA)
When it comes to a VPN and its apps, some people want a UI with only what is needed. Private Internet Access is exactly this.
![]()
IPVanish (See the latest pricing at IPVanish)
IPVanish is ane of the easiest VPNs to apply, thanks to an app with a user interface that appeals to both novices and experts akin.
More Windows resources
For more helpful articles, coverage, and answers to common questions about Windows 10 and Windows 11, visit the following resources:
- Windows ten on Windows Cardinal — All you need to know
- Windows 10 aid, tips, and tricks
- Windows 11 on Windows Fundamental — All you demand to know
- Windows eleven aid, tips, and tricks
We may earn a committee for purchases using our links. Learn more.

Source: https://www.windowscentral.com/how-manually-configure-vpn-windows-11
Posted by: hagemanhimpre.blogspot.com
0 Response to "How to manually configure a VPN on Windows 11"
Post a Comment